Written and reviewed by A Pomsky Editorial Team. Originally published 2026-07-26; substantively reviewed July 26, 2026.
Training boundary: Use humane, reward-based methods and protect safety with management. Pain, panic, aggression, a bite history, or serious handling risk requires a veterinarian or qualified behavior professional. Read the editorial policy.
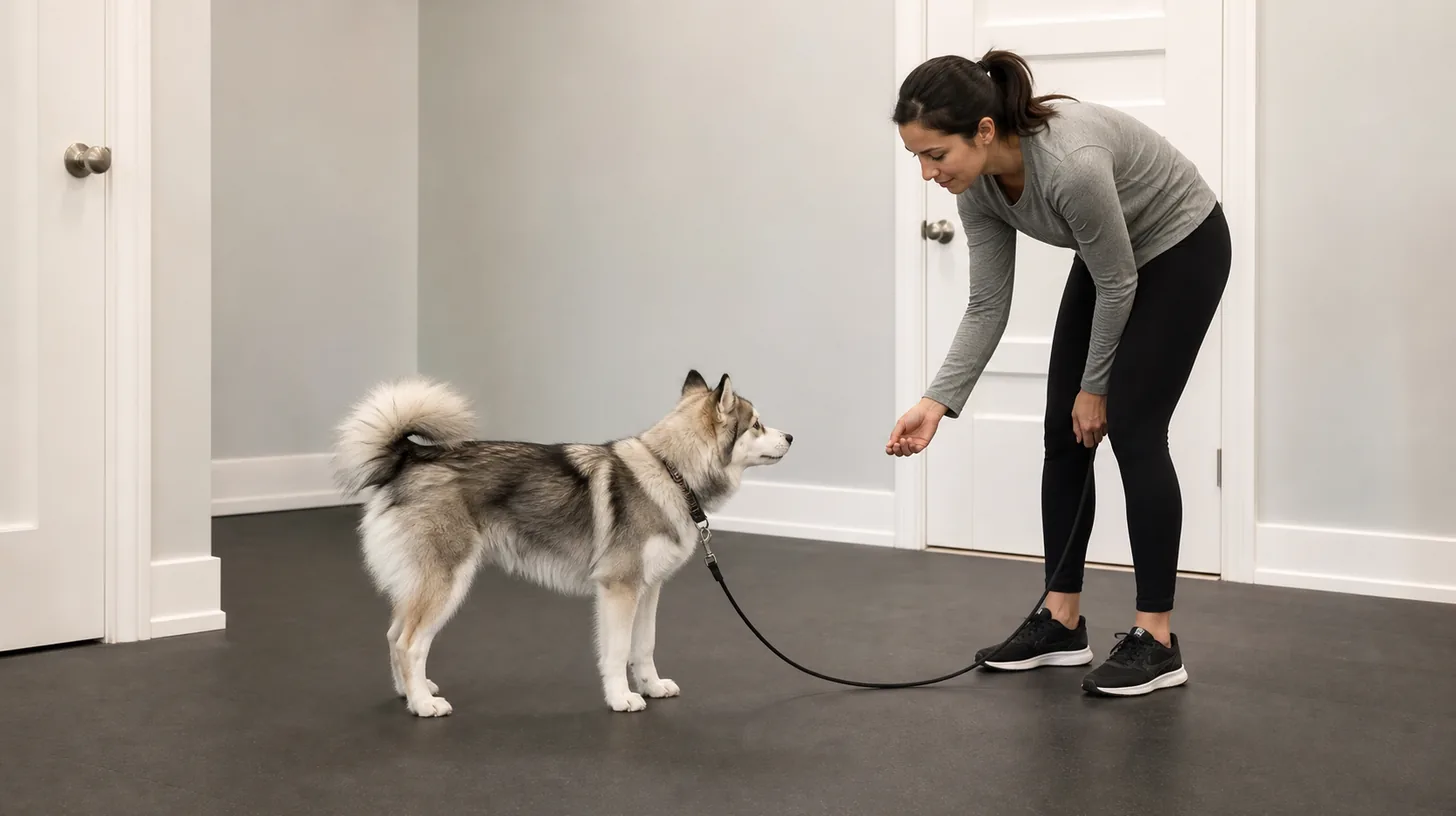
Direct answer: Work in a closed clear room on nonslip flooring. Walk one or two easy steps with the Pomsky, say the stop cue once and become still without tightening the leash or blocking the dog. Mark the first voluntary pause, even if only one second, and deliver the reward at the stopped position. Use a separate release to resume ordinary movement. Repeat from very short distances. Add a little handler distance only after the pause is reliable, and never test the behavior near roads, doors, stairs or moving equipment. A stop-motion cue interrupts movement; stay begins after the dog is already stationary. Stop for slipping, leash tension, fear, confusion, pain or inability to pause.
This page teaches interruption of ongoing forward movement into a brief neutral pause; stay begins from an already stationary posture, walk-slow changes pace without stopping, and curb pause is tied to one environmental boundary. Choose a short indoor route with secure doors, level traction and no stairs, furniture edges or other animals. Move at an ordinary comfortable pace with slack equipment before asking for any pause. The plan keeps management, voluntary behavior, reinforcement and transition criteria explicit.
Use a Closed Clear Practice Lane
Choose a short indoor route with secure doors, level traction and no stairs, furniture edges or other animals.
A second capable adult can verify the boundary during early practice or higher-risk situations. That person should follow the same sequence and avoid adding prompts, handling, or access that changes the task. The shared standard remains Practice in a closed room by walking one or two easy steps, say the stop cue once immediately before the caregiver becomes still, mark the Pomsky's first voluntary pause, reward at the stopped position, release into ordinary movement, add only a little distance, and never treat the unfinished cue as protection near traffic, doors, stairs or other hazards.. In this routine, step 1 is the use a closed clear practice lane decision.
The absence of an incident is not proof that the arrangement is sound. Recheck for adding reward at the stopped position before mark the first voluntary pause is stable, skipping increase duration before distance, or continuing through pain, fear, guarding, unsafe equipment, loss of control or prolonged avoidance. Document For How to Teach a Pomsky a Stop-Motion Cue, record Use a Closed Clear Practice Lane, Begin With One or Two Slow Steps, Say the Stop Cue Once, Mark the First Voluntary Pause; compare Reward at the Stopped Position, Release Back Into Movement, Increase Duration Before Distance; then close with Add Only One Step of Separation, Retain Physical Management Near Hazards, Stop for Tension or Physical Concern. Use dates, direct observations, transition quality and recovery. so a later caregiver can distinguish a passed step from one that was skipped. Record the result of use a closed clear practice lane before continuing.
Begin With One or Two Slow Steps
Move at an ordinary comfortable pace with slack equipment before asking for any pause.
Perform this check before adding the next variable. The target remains Practice in a closed room by walking one or two easy steps, say the stop cue once immediately before the caregiver becomes still, mark the Pomsky's first voluntary pause, reward at the stopped position, release into ordinary movement, add only a little distance, and never treat the unfinished cue as protection near traffic, doors, stairs or other hazards.. Work in a controlled low-distraction setup for use a closed clear practice lane, begin with one or two slow steps and say the stop cue once, with nonslip footing, an open exit, suitable rewards and one adult handler. If the setup cannot preserve that condition, simplify it or stop rather than relying on speed or physical control. In this routine, step 2 is the begin with one or two slow steps decision.
If the Pomsky cannot remain comfortable or the equipment and environment cannot remain controlled, end the attempt. Do not proceed through adding reward at the stopped position before mark the first voluntary pause is stable, skipping increase duration before distance, or continuing through pain, fear, guarding, unsafe equipment, loss of control or prolonged avoidance. Capture For How to Teach a Pomsky a Stop-Motion Cue, record Use a Closed Clear Practice Lane, Begin With One or Two Slow Steps, Say the Stop Cue Once, Mark the First Voluntary Pause; compare Reward at the Stopped Position, Release Back Into Movement, Increase Duration Before Distance; then close with Add Only One Step of Separation, Retain Physical Management Near Hazards, Stop for Tension or Physical Concern. Use dates, direct observations, transition quality and recovery. before deciding what changes next. Record the result of begin with one or two slow steps before continuing.
Say the Stop Cue Once
Give the word immediately before your own body becomes still without leaning, reaching or stepping into the dog.
Use an observable pass condition: the relevant item is checked, the boundary is closed, and the Pomsky can remain safe without being used as a test. This protects the main objective, Practice in a closed room by walking one or two easy steps, say the stop cue once immediately before the caregiver becomes still, mark the Pomsky's first voluntary pause, reward at the stopped position, release into ordinary movement, add only a little distance, and never treat the unfinished cue as protection near traffic, doors, stairs or other hazards., while leaving a clear point at which the caregiver can step back. In this routine, step 3 is the say the stop cue once decision.
Do not convert this step into a stress test. The principal avoidable risks are adding reward at the stopped position before mark the first voluntary pause is stable, skipping increase duration before distance, or continuing through pain, fear, guarding, unsafe equipment, loss of control or prolonged avoidance. Write down For How to Teach a Pomsky a Stop-Motion Cue, record Use a Closed Clear Practice Lane, Begin With One or Two Slow Steps, Say the Stop Cue Once, Mark the First Voluntary Pause; compare Reward at the Stopped Position, Release Back Into Movement, Increase Duration Before Distance; then close with Add Only One Step of Separation, Retain Physical Management Near Hazards, Stop for Tension or Physical Concern. Use dates, direct observations, transition quality and recovery.; a short factual note is more useful than a reassuring guess. Record the result of say the stop cue once before continuing.
Mark the First Voluntary Pause
Reinforce the earliest moment all four paws stop traveling, even when posture is not a formal sit or stand.
Keep the sequence repeatable across caregivers. Say what is being checked, complete it, and return equipment and people to neutral before continuing. In this page's context, success means Practice in a closed room by walking one or two easy steps, say the stop cue once immediately before the caregiver becomes still, mark the Pomsky's first voluntary pause, reward at the stopped position, release into ordinary movement, add only a little distance, and never treat the unfinished cue as protection near traffic, doors, stairs or other hazards.; it does not mean proving that a known risk can be tolerated. In this routine, step 4 is the mark the first voluntary pause decision.
Stop when the expected condition is absent or the situation begins to depend on force, luck, or an open boundary. Specifically avoid adding reward at the stopped position before mark the first voluntary pause is stable, skipping increase duration before distance, or continuing through pain, fear, guarding, unsafe equipment, loss of control or prolonged avoidance. The follow-up record should cover For How to Teach a Pomsky a Stop-Motion Cue, record Use a Closed Clear Practice Lane, Begin With One or Two Slow Steps, Say the Stop Cue Once, Mark the First Voluntary Pause; compare Reward at the Stopped Position, Release Back Into Movement, Increase Duration Before Distance; then close with Add Only One Step of Separation, Retain Physical Management Near Hazards, Stop for Tension or Physical Concern. Use dates, direct observations, transition quality and recovery.. Record the result of mark the first voluntary pause before continuing.
Reward at the Stopped Position
Deliver low beside the muzzle so reinforcement does not draw the Pomsky forward or behind the caregiver.
Treat this as one part of the complete routine, not an isolated trick. The surrounding setup is a controlled low-distraction setup for use a closed clear practice lane, begin with one or two slow steps and say the stop cue once, with nonslip footing, an open exit, suitable rewards and one adult handler. A clean transition reduces ambiguity and makes it easier to notice when the dog, equipment, environment, or records differ from the previous attempt. In this routine, step 5 is the reward at the stopped position decision.
The absence of an incident is not proof that the arrangement is sound. Recheck for adding reward at the stopped position before mark the first voluntary pause is stable, skipping increase duration before distance, or continuing through pain, fear, guarding, unsafe equipment, loss of control or prolonged avoidance. Document For How to Teach a Pomsky a Stop-Motion Cue, record Use a Closed Clear Practice Lane, Begin With One or Two Slow Steps, Say the Stop Cue Once, Mark the First Voluntary Pause; compare Reward at the Stopped Position, Release Back Into Movement, Increase Duration Before Distance; then close with Add Only One Step of Separation, Retain Physical Management Near Hazards, Stop for Tension or Physical Concern. Use dates, direct observations, transition quality and recovery. so a later caregiver can distinguish a passed step from one that was skipped. Record the result of reward at the stopped position before continuing.
Release Back Into Movement
Use a separate known release and take one easy step so the end of the pause is unambiguous.
Pause long enough to inspect the result rather than assuming the action worked. Look at the dog, the physical boundary, and the next movement available to the caregiver. Continue only when the arrangement still supports Practice in a closed room by walking one or two easy steps, say the stop cue once immediately before the caregiver becomes still, mark the Pomsky's first voluntary pause, reward at the stopped position, release into ordinary movement, add only a little distance, and never treat the unfinished cue as protection near traffic, doors, stairs or other hazards.. In this routine, step 6 is the release back into movement decision.
If the Pomsky cannot remain comfortable or the equipment and environment cannot remain controlled, end the attempt. Do not proceed through adding reward at the stopped position before mark the first voluntary pause is stable, skipping increase duration before distance, or continuing through pain, fear, guarding, unsafe equipment, loss of control or prolonged avoidance. Capture For How to Teach a Pomsky a Stop-Motion Cue, record Use a Closed Clear Practice Lane, Begin With One or Two Slow Steps, Say the Stop Cue Once, Mark the First Voluntary Pause; compare Reward at the Stopped Position, Release Back Into Movement, Increase Duration Before Distance; then close with Add Only One Step of Separation, Retain Physical Management Near Hazards, Stop for Tension or Physical Concern. Use dates, direct observations, transition quality and recovery. before deciding what changes next. Record the result of release back into movement before continuing.
Increase Duration Before Distance
Build from one second to two while caregiver position, room and starting speed remain unchanged.
A second capable adult can verify the boundary during early practice or higher-risk situations. That person should follow the same sequence and avoid adding prompts, handling, or access that changes the task. The shared standard remains Practice in a closed room by walking one or two easy steps, say the stop cue once immediately before the caregiver becomes still, mark the Pomsky's first voluntary pause, reward at the stopped position, release into ordinary movement, add only a little distance, and never treat the unfinished cue as protection near traffic, doors, stairs or other hazards.. In this routine, step 7 is the increase duration before distance decision.
Do not convert this step into a stress test. The principal avoidable risks are adding reward at the stopped position before mark the first voluntary pause is stable, skipping increase duration before distance, or continuing through pain, fear, guarding, unsafe equipment, loss of control or prolonged avoidance. Write down For How to Teach a Pomsky a Stop-Motion Cue, record Use a Closed Clear Practice Lane, Begin With One or Two Slow Steps, Say the Stop Cue Once, Mark the First Voluntary Pause; compare Reward at the Stopped Position, Release Back Into Movement, Increase Duration Before Distance; then close with Add Only One Step of Separation, Retain Physical Management Near Hazards, Stop for Tension or Physical Concern. Use dates, direct observations, transition quality and recovery.; a short factual note is more useful than a reassuring guess. Record the result of increase duration before distance before continuing.
Add Only One Step of Separation
Practice from close range with a secure drag line only when the near pause is predictable and comfortable.
Perform this check before adding the next variable. The target remains Practice in a closed room by walking one or two easy steps, say the stop cue once immediately before the caregiver becomes still, mark the Pomsky's first voluntary pause, reward at the stopped position, release into ordinary movement, add only a little distance, and never treat the unfinished cue as protection near traffic, doors, stairs or other hazards.. Work in a controlled low-distraction setup for use a closed clear practice lane, begin with one or two slow steps and say the stop cue once, with nonslip footing, an open exit, suitable rewards and one adult handler. If the setup cannot preserve that condition, simplify it or stop rather than relying on speed or physical control. In this routine, step 8 is the add only one step of separation decision.
Stop when the expected condition is absent or the situation begins to depend on force, luck, or an open boundary. Specifically avoid adding reward at the stopped position before mark the first voluntary pause is stable, skipping increase duration before distance, or continuing through pain, fear, guarding, unsafe equipment, loss of control or prolonged avoidance. The follow-up record should cover For How to Teach a Pomsky a Stop-Motion Cue, record Use a Closed Clear Practice Lane, Begin With One or Two Slow Steps, Say the Stop Cue Once, Mark the First Voluntary Pause; compare Reward at the Stopped Position, Release Back Into Movement, Increase Duration Before Distance; then close with Add Only One Step of Separation, Retain Physical Management Near Hazards, Stop for Tension or Physical Concern. Use dates, direct observations, transition quality and recovery.. Record the result of add only one step of separation before continuing.
Retain Physical Management Near Hazards
Use barriers and fitted equipment around traffic, exits, stairs and machinery regardless of training performance.
Use an observable pass condition: the relevant item is checked, the boundary is closed, and the Pomsky can remain safe without being used as a test. This protects the main objective, Practice in a closed room by walking one or two easy steps, say the stop cue once immediately before the caregiver becomes still, mark the Pomsky's first voluntary pause, reward at the stopped position, release into ordinary movement, add only a little distance, and never treat the unfinished cue as protection near traffic, doors, stairs or other hazards., while leaving a clear point at which the caregiver can step back. In this routine, step 9 is the retain physical management near hazards decision.
The absence of an incident is not proof that the arrangement is sound. Recheck for adding reward at the stopped position before mark the first voluntary pause is stable, skipping increase duration before distance, or continuing through pain, fear, guarding, unsafe equipment, loss of control or prolonged avoidance. Document For How to Teach a Pomsky a Stop-Motion Cue, record Use a Closed Clear Practice Lane, Begin With One or Two Slow Steps, Say the Stop Cue Once, Mark the First Voluntary Pause; compare Reward at the Stopped Position, Release Back Into Movement, Increase Duration Before Distance; then close with Add Only One Step of Separation, Retain Physical Management Near Hazards, Stop for Tension or Physical Concern. Use dates, direct observations, transition quality and recovery. so a later caregiver can distinguish a passed step from one that was skipped. Record the result of retain physical management near hazards before continuing.
Stop for Tension or Physical Concern
End for leash tightening, skidding, stiffness, pain, startle, repeated motion, fear or confused freezing.
Keep the sequence repeatable across caregivers. Say what is being checked, complete it, and return equipment and people to neutral before continuing. In this page's context, success means Practice in a closed room by walking one or two easy steps, say the stop cue once immediately before the caregiver becomes still, mark the Pomsky's first voluntary pause, reward at the stopped position, release into ordinary movement, add only a little distance, and never treat the unfinished cue as protection near traffic, doors, stairs or other hazards.; it does not mean proving that a known risk can be tolerated. In this routine, step 10 is the stop for tension or physical concern decision.
If the Pomsky cannot remain comfortable or the equipment and environment cannot remain controlled, end the attempt. Do not proceed through adding reward at the stopped position before mark the first voluntary pause is stable, skipping increase duration before distance, or continuing through pain, fear, guarding, unsafe equipment, loss of control or prolonged avoidance. Capture For How to Teach a Pomsky a Stop-Motion Cue, record Use a Closed Clear Practice Lane, Begin With One or Two Slow Steps, Say the Stop Cue Once, Mark the First Voluntary Pause; compare Reward at the Stopped Position, Release Back Into Movement, Increase Duration Before Distance; then close with Add Only One Step of Separation, Retain Physical Management Near Hazards, Stop for Tension or Physical Concern. Use dates, direct observations, transition quality and recovery. before deciding what changes next. Record the result of stop for tension or physical concern before continuing.
When to Stop and Escalate
Stop when the Pomsky, caregiver, equipment, records, or environment no longer supports Practice in a closed room by walking one or two easy steps, say the stop cue once immediately before the caregiver becomes still, mark the Pomsky's first voluntary pause, reward at the stopped position, release into ordinary movement, add only a little distance, and never treat the unfinished cue as protection near traffic, doors, stairs or other hazards.. Do not improvise through adding reward at the stopped position before mark the first voluntary pause is stable, skipping increase duration before distance, or continuing through pain, fear, guarding, unsafe equipment, loss of control or prolonged avoidance. Seek a veterinarian for health or pain concerns and a qualified reward-based professional for exceptions during retain physical management near hazards or stop for tension or physical concern. Bring the factual observations already collected rather than recreating the event.
Before another attempt, review For How to Teach a Pomsky a Stop-Motion Cue, record Use a Closed Clear Practice Lane, Begin With One or Two Slow Steps, Say the Stop Cue Once, Mark the First Voluntary Pause; compare Reward at the Stopped Position, Release Back Into Movement, Increase Duration Before Distance; then close with Add Only One Step of Separation, Retain Physical Management Near Hazards, Stop for Tension or Physical Concern. Use dates, direct observations, transition quality and recovery.. Resume only after the responsible person, physical setup, and controlling instructions are clear. A stop is part of the protocol: it preserves useful evidence and prevents uncertainty from becoming exposure.
Keep the Routine Current
Recheck the complete setup whenever the dog, household, product, instructions, environment, or purpose changes. The intended outcome remains Practice in a closed room by walking one or two easy steps, say the stop cue once immediately before the caregiver becomes still, mark the Pomsky's first voluntary pause, reward at the stopped position, release into ordinary movement, add only a little distance, and never treat the unfinished cue as protection near traffic, doors, stairs or other hazards., not a perfect-looking performance. Use the newest primary instruction, retain dated records, and retire superseded assumptions so every caregiver begins from the same current plan.
Sources reviewed
Each source is used only for the claim scopes listed below. None establishes a guaranteed Pomsky outcome or replaces individual professional assessment.
- American Veterinary Society of Animal Behavior: Humane Dog Training Position Statement - Supports: reward-based training; aversive-method risk; behavior change principles. Limit: Does not guarantee outcomes for an individual dog.
- American Animal Hospital Association: Lifestyle and Safety Assessment - Supports: appropriate confinement; leash, collar and harness planning; lifestyle-specific safety review. Limit: Equipment selection must account for the individual dog's anatomy, behavior, health, and environment.